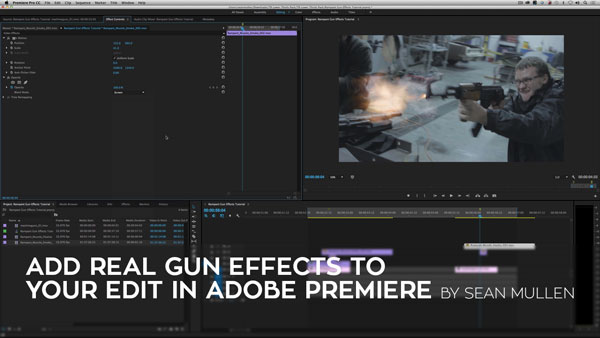
VFX Artist and Rampant Design CEO Sean Mullen shows us how to add real gun effects to your action scene in Adobe Premiere Pro.
How to Add Real Gun Effects to Your Action Scene in Adobe Premiere Pro from Rampant Design Tools on Vimeo.
Sign Up for Our Newsletter and Grab Your Free 4K Effects Today:
[toggle title=”Video Transcription”]How to Add Real Gun Effects to Your Action Scene in Adobe Premiere Pro
All you have to do is:
Sean Mullen: Hey, hey party people, I’m Sean Mullen from RampantDesignTools.com and today we’re going to do something pretty cool. I’m going to show you how to add real gun effects to your action scene in Adobe Premiere Pro. Not using after 
[00:01:00] What do we do here? There’s only a couple steps that you need to do, especially in Premiere, in order to give yourself a really cool looking gunshot for your scene. First thing we need to do is give dude here some muzzle flashing. We need to scrub through and figure out where we’re going to put it. That looks pretty good right there. I’m going to go ahead and hit M, which will leave a marker right here, as you can see. That way if I’m screwing around, or if whatever happens, I hit the mouse or I just don’t remember, I don’t have to refigure it out, so cool, that’s where we’re going to put our muzzle flash. Next thing we need is a flash. Like I said, I got these from 4kfree.com, so we’ll go ahead and drag this muzzle flash over here, and it starts at the very first frame right here, and as you can see they have alpha channels. Now, of course, just by chance, it happened to land right in the middle of his forehead, and that’s some really cool sci-fi stuff, but that’s not what we’re trying to do here.
[00:02:00] Go ahead and click on the muzzle flash, go on over to effects controls, twirl down motion and reposition here, like so, and put it where you want. Like I said, these have alpha channels, so if you don’t want to use blend modes you don’t have to, but I blend everything, I blend it all. Go ahead and go over to opacity right here, twirl it down and switch blend mode from normal to screen. I like that better, that’s entirely up to you when you’re designing your style. It’s a 100% stylistic preference. If we roll back and hit play, we’ve got a muzzle flash. For me, I add a couple more steps to make this work a little bit better.
[00:03:00] The next thing we need to do is add some smoke. Let’s go ahead and grab our smoke shot, right over here. I just randomly put it in the middle of the shot because I’m going to reposition it and scale and everything. Go ahead and click on smoke and twirl down motion in the effects controls, move it over, move it up. Obviously this thing is massive. This is not a rocket launcher, so let’s go ahead and dial this down to about, I don’t know, 40 or so, that’s cool, and then move it back, and move it down like so. That’s going to be the general area I’m going to put it. I’m obviously going to have to move this clip around a little in order to get it to work, but before I do that I am going to twirl down opacity and switch blend mode from normal to screen, because like I said, I blend it all. That to me looks a lot better.
[00:04:00] Now let’s go ahead and move this clip down in the timeline just a little bit so it’s not starting before the muzzle flash. We can turn the muzzle flash off here and just do smoke. You can see that’s pretty cool. The reason why we do this is it really does help. I may have to reposition this just a little bit, like so. Smoke is a secondary effect. You obviously don’t need to have it, but it really does help. That’s pretty cool. We’ll turn this back on and mix it with our muzzle, cool. The smoke is a little more prominent than I want it to be, so that’s easy, just go ahead and make sure you’re highlighting your smoke and go up to opacity and turn off the stopwatch, because I’m not key framing this opacity, and just dial this down to around maybe half, 50%, and see what that looks like. Roll it back, that’s what I’m talking about, now we’re getting there.
If we consider smoke a secondary effect, there’s another secondary effect, or even a tertiary effect, that I do, and this is the last effect that you need to do, and it’s called reactive lighting. We’re emitting this giant ball of light, but there’s nothing happening in the scene. There’s no reaction, there’s no reactive lighting. That’s why I left these layers blank here, you could probably do it with just one, but in case you want to double it up, you can do this. Go ahead and highlight your original clip, your footage layer here, and go ahead and option click or ALT click it and drag it up, that’s duplicating it. Let’s go back to our mask … Excuse me, let’s go back to our marker layer. I was getting ahead of myself there. We’re going to go ahead and mask. My brain is speaking faster than my mouth here.
[00:05:00] Dial down opacity and you’re going to see these options right here, this fun little pen tool. Go ahead and click on it. This is not like your aftereffects pen tool, it’s a little bit more wonky than that, but it’s okay, it gets the job done. Let’s go ahead, just start slowly tracing, because if you go too fast it wants you to do, “Oh look at that I’m turning,” so go ahead and slowly go up and around the gun. Don’t worry about it being a hard lined roto, it’s all good. Just go up, around his face, and a little bit into his head, and then on to his arms, and down the clip here …
[00:06:00] This is probably the ugliest matte that’s ever been created, and that’s deliberate. Let’s go ahead and go back over here to our effects controls, and right here where it says opacity turn the blend mode from normal to let’s do add. Boom, now we get to see exactly what the matte looks like. If I click off the layer, you can see, that is one hideous looking matte. What do we do to fix that? Go ahead and go to our mask feather here and dial it way out. There we go. If you find yourself, that the glow is going way too far out, not a problem, just go to mask expansion and suck it on in. There you go.
[00:07:00] The next thing we need to do is animate this. Let’s go ahead and turn off the stopwatch and turn it back on to create a key frame, like that, and we’re already at 100%. Go ahead and hit the left arrow key now, one frame, and dial that to 0. No flash, hit the right key, the right arrow key, flash, no flash, flash, no flash, flash, super easy. Let’s go 2 more frames and let’s turn off our opacity completely. If I roll back and I hit play, now we have a flash. All right, almost done, bear with me. Make sure you highlighted your glow layer, there’s obviously an issue here. This is more yellow, orange, warmy, and this is more Ghostbusters white, not cool.
[00:08:00] Let’s go ahead and go to effects, and go to color correction, and tint. Drag that on over your layer, and let’s go ahead and ignore matte black 2, and let’s go matte white 2. Click on here, on your little eye dropper. Let’s find a nice little orange piece, and that’s pretty good. Let’s go ahead and click on the color now, it’s a little bit not where I want it to be, let’s dial up a little brightness, a little more and then maybe a little more color, like so, there you go. Roll it back. Cool. If that’s too much, if you’re like, “I’m really overanalyzing this,” for whatever reason, just make sure you’re on your frame with the marker, which is right here, the 100%. Go ahead and just make sure you’re there, and then dial the 100% down to, I don’t know, let’s do 70, and then roll it back. Just play with it until it works for you. There you go. It’s that simple.
[00:09:00] Gun effects are super simple, no matter what app you’re using, you want to make sure you add your muzzle flash somehow. Go ahead and grab a muzzle flash from us or someone else, or make your own, then you add your smoke, because it’s a secondary effect, and then of course add some reactive lighting. It’s muzzle flash, smoke, reactive lighting, just like so, so like this. Muzzle flash, boom, smoke, a few frames later, boom, and reactive lighting, boom. See? Super, super simple. Thanks for watching, try to keep this as quick as possible. Super easy to add your own muzzle flashes to your shot. If you have an comments, questions, suggestions, whatever; leave them here in the comments. We love your questions. We’ll do more tutorials based on things that you ask about. Of course, please go to 4kfree.com, load up on all kinds of free 4k goodness. Please make sure to subscribe here, follow us. We are nothing without you guys, we love each and every one of you. Thank you for all of your support and your constant phone calls and emails. It makes us feel special. Thanks for everything guys, I’m Sean Mullen from RampantDesignTools.com and thanks for watching.
[/toggle]

