VFX Artist and Rampant Design CEO Sean Mullen shows us how to split text in Adobe Premiere and Adobe After Effects.
Ask Rampant: How to Split Text in Adobe After Effects and Adobe Premiere from Rampant Design Tools on Vimeo.
Sign Up for Our Newsletter and Grab Your Free 4K Effects Today:
[toggle title=”Video Transcription”]How to Speed Ramp in Adobe Premiere Video Transcription
All you have to do is:
Hey, hey, everyone. I’m Sean Mullen from Rampant Design and welcome to another episode of Ask Rampant, our weekly series where you ask the questions and we do our best to answer them. Today’s question, how do you do that text wipe effect in your promos?
This technique is known … I don’t know what it’s known as, to be honest. I just call it Split Text. My clients call it Split Text. There’s probably an official term for it. I just don’t happen to know what it’s called. You see this effect everywhere.
If you’ve ever watched anything on the A&E Network, their promos are heavy with it. Esquire does the same thing. You see this all over YouTube. This is a really fantastic way to spruce up your type and your text effects if you’re doing a promo, or if you’re doing some kind of a title sequence or a template, or just anything that you want, just some really classy type and it doesn’t look canned.
I’m going to jump into After Effects and show you how it’s done. AE is my favorite app when it comes to animating type and motion graphics. However, if you don’t use After Effects and you don’t want to learn it, it’s okay. I’m also going to show you a way to do this in Adobe Premier, so don’t hit quick just yet. Hang on and I’m going to run through After Effects real quick. Then I’ll show you how it’s done in Premier.
Let’s jump into AE. As you can see, I’ve already got some comps built. I’m going to show you how to do the traditional split text effect where it comes from the center like that and another one where you’re right justified, so say you want to put a logo or some video here, or you’re going to have an actor here or whatever. Then, of course, my favorite one, the one that splits from the center and reveals.
I’m going to show you how to do these three text effects very, very quickly. If it wasn’t for my rambling on, we’d be done already. It’s that simple.
First thing we need to do is make a new composition. If you’ve never used After Effects before, that’s just a fancy term for timeline. To do that, you go to composition and you click new composition. You can also, right here where it says Command End, you can also hit Command End to make a new comp. I’m going to do that, Command End. [00:02:00] It brings up this box. Right here, it says composition settings. We’re going to name our comp, so let’s just call it Split Type. Boom.
Here is where you pick your settings. I’m doing 1920 by 1080 HD, square pixels at 23976. There’s my duration, my resolution, all the happy fun stuff. This probably will work for you, but if you have something specific, just dial it in here and click OK. All its done is created a timeline for you.
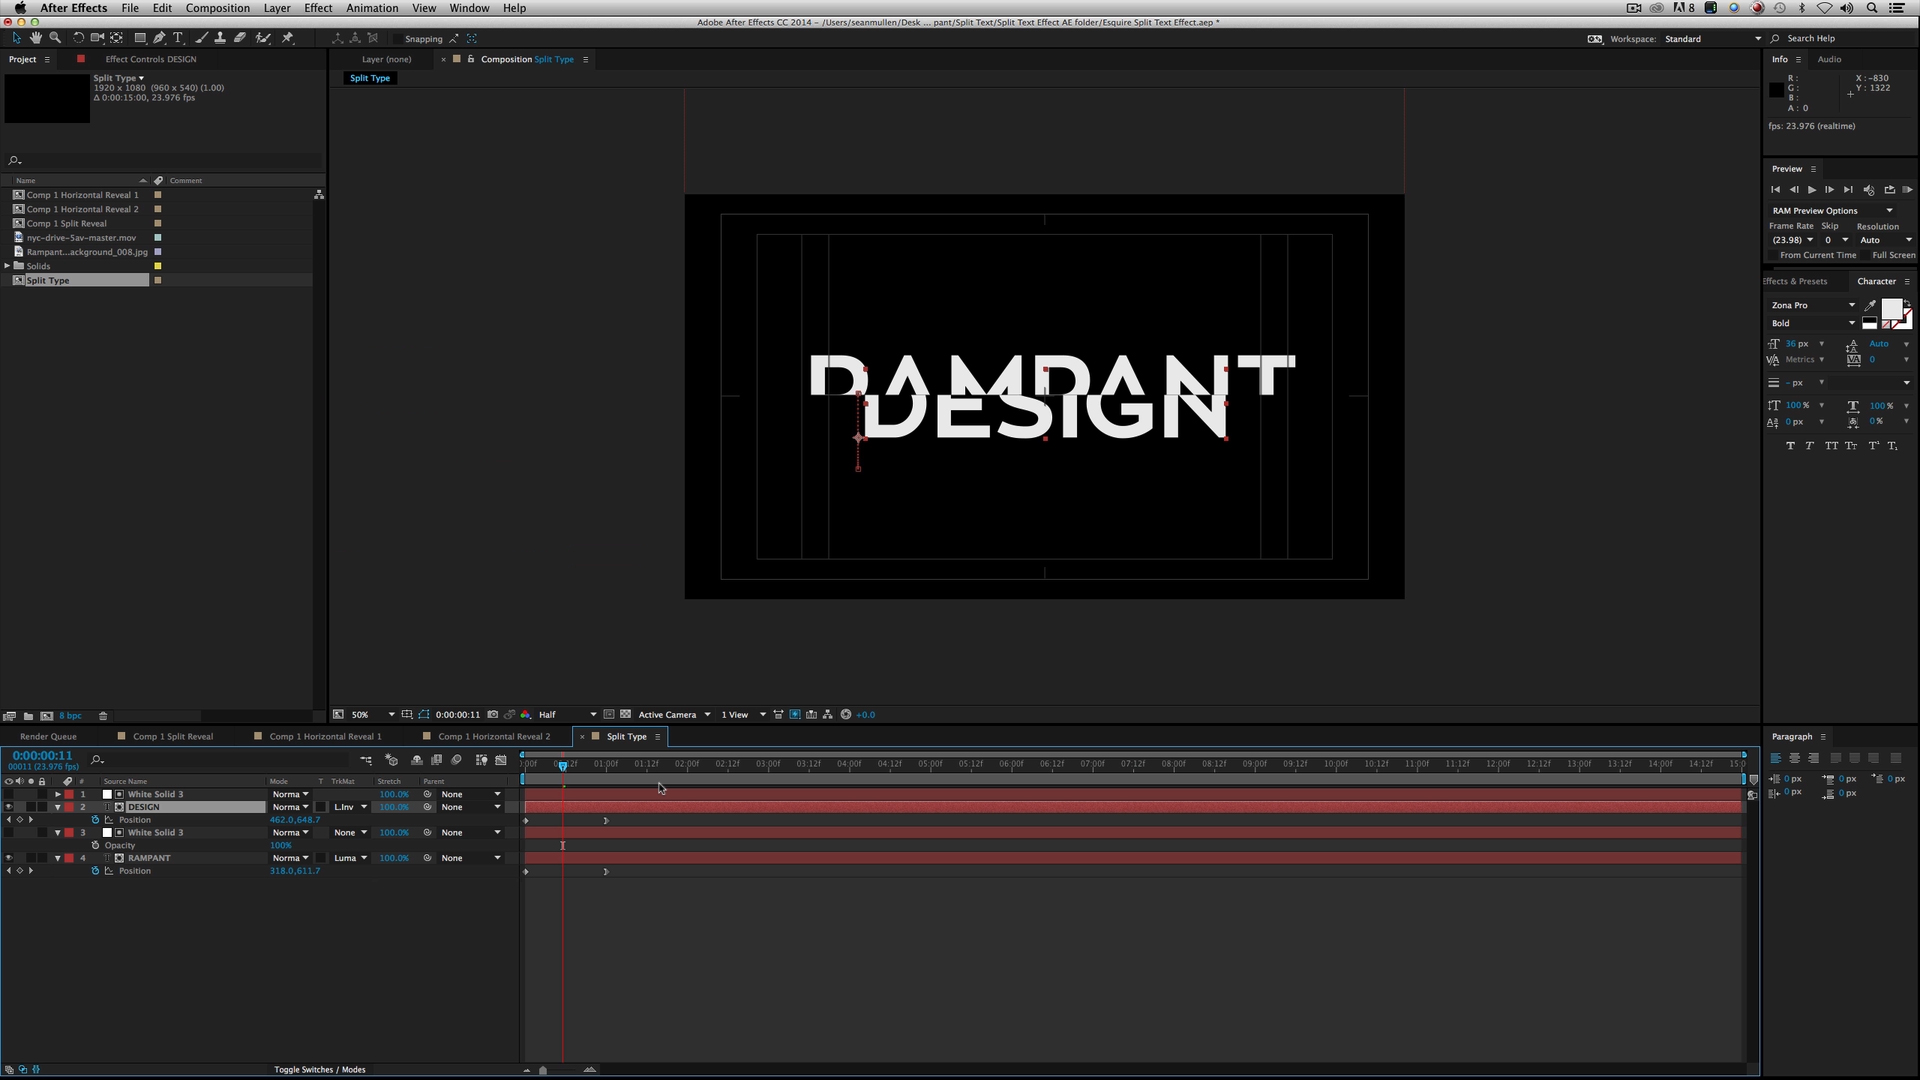
Our timeline is empty. What do we do? We start off with our type. Click the text tool right here and click in the screen, and just type something. I’m going to type rampant and I’m going to scale it up real big. For those of you who are interested, I am using the Zona Pro font. I am really crazy about it right now. I go through this phase where I use a font up until I hate it and it’s dead to me. Right now, I’m still in love with this font. I’m sure a week from now I will never use this thing again. It’s a great font though.
I’m going to, like I said, type rampant here and I’ll turn on my title action save just for a little bit of reference to see where we are. That’s a little too big there. There we go. I’ll just adjust to taste. That’s pretty good. What I’ll do is I’ll highlight this text layer and I’ll hit Command D to duplicate it, turn off the bottom layer, and change this from rampant to design. There we go. Turned them both on and now design is on top of rampant.
I’m going to hit P in the design layer and pull this down, so I can move it beneath the rampant. Now I could leave it here. I like that justification, but I actually want it to be centered. I’m going to go ahead and adjust [inaudible 00:03:39]. There we go. It’s pretty good.
If you ever want to reposition your type after you’ve got your nice layout, just hit Command A or you can Shift Select your layers. Then just hold Shift and use the arrow keys to move your text around, or you can not hold Shift and move them [00:04:00] in small increments. I usually work in increments of ten which is what Shift does. That’s pretty good. I’m happy. Let’s move on.
There’s two steps to this. There is the animation and there’s the matting, so let’s go to one second which is right here. You can either click on the actual time itself or you can click and drag the CT here, CTI. I’m going to go to one, one second. You can also click here and put in your time too. I love how Adobe gives you nine different ways to do the same thing. That’s great.
We’re at one second. This is where I want my animation to finish and this is our finish position. I’m already done animating this particular position. I’ll highlight both layers, hit P to make sure that the positional information is up, and then I’ll click the stopwatch. If you highlight both layers at the same time you click stopwatch, it will make a keyframe on both. If you didn’t have them both highlighted, you have to do it one at a time.
Now as you can see right here, I’ve got two keyframes. It’s my finished position. We could roll back in the timeline or you can hit home to get back to the first frame. Here’s where the animation starts. I’m going to start with rampant and I’m going to pull it down right on top of design like so. Then I’m going to click on design and pull it up to where rampant was. Now it looks like it says Design Rampant.
If I hit the space bar, there you go. Now one thing I’m sure you’ve seen a lot when you work in any animation tool is linear keyframes look like it hits a brick wall when it hits the keyframe, boom, like that. That’s no good for me, so I’m going to go ahead and click and drag over these two keyframes right here, those two [inaudible 00:05:38] keyframes. Right-click, go to Keyframe Assistant and Easy Ease In. That’s going to make this animation a lot smoother.
Go back to the top, hit the space bar. Boom. It’s nice. Much smoother. The animation is done. Now the next step is to matte it.
Let’s go under Layer, New, Solid, or you can hit Command Y. I’m not going to label the solid. [00:06:00] I know what a solid is, but you can label it anything you want. Hit OK. I’ve made my solid white. I like to work with mattes in Luma, so make sure you’re using either white or black. Any variation, any color in between, is not going to work for you if you’re doing Luma.
I choose white. Right now, it’s covering the entire screen. That’s no good. I want to reposition this first layer right up here, the solid, hit P, pull it all the way up until it’s just covering rampant like that. Now let’s pull the solid. Put it above rampant and now click on the rampant layer, and choose Track Matte, Luma Matte. Let’s roll it back and you’ll see what happens.
I’ll turn off Design for a second. That’s cool. How does that work? As a Luma matte, anything that’s white is showing, anything that’s black is not showing. I readjusted this layer just in between the two words, Rampant and Design. As it creeps in, it’s showing. I’ll show you this right here. I’ll turn this off.
As you can see, here’s the bounding box for the solid. Anything inside this box that’s white, right here, is going to show. When rampant’s half way through, the rest of rampant is still here. If I turn off the Track matte, see, it’s still there. I’m just blocking it with the Track matte.
Now if you like to work with Alpha mattes instead of Luma mattes, it’s the same principle. Where ever this box, whatever the layer is, is going to show your type if you pick Alpha. Same effect because my box is there. Now if I move my box, see, it’s where ever the box is. I like working in Luma, so I’ll stick with Luma. [00:08:00] You’ve seen how we do it for rampant, so the next step is just to duplicate this and redo it for design.
I’ll hit the solid, hit Duplicate, pull it up, and then do Luma as well. Now watch what happens though when I turn … I don’t see design. I see the wrong part of design. What’s going on? What’s happening? It’s because the box is still up here. I have two options. I can do Luma inverted which would take the black values instead of the white values. Do Luma inverted right here and now you see Rampant Design.
Now whatever is black is showing and whatever is white is not, or if you just want to keep things organized and you don’t want to do some Luma on some Luma inverted, go back to Luma and then just reposition the matte. Hit P and pull it down. Now roll back, hit the space bar, and you now have your growing type effect with splits. That’s super simple. If it wasn’t for me yammering on, we’d be done by now.
Here’s a little helpful tip. If you’ve got all this work done and you’re like, “I want to reposition or move this around a little bit, I don’t like where it is within reason,” because you’re still matting, you can go to Layer New, Null Object. Highlight design, highlight rampant, and take this pick whip and go over to the null. Holding Shift and the arrow keys, you can reposition. If you’re like, “I’m a little farther over than I want to be,” boom, there you go. Your animation will still work.
Now if you move it too far, it’s not moving the matte. You’ll actually lose them. I’ll show you this. I’ll highlight the null and I’ll move it up. You can’t do that, but you can do it within reason and not lose the effect. There’s that. I’m going to show you real quick how to do the alternatives that I showed you.
As I scrub through here, we’re onto the next one. This is a really cool effect [00:10:00] where it comes from the center and moves right, so right justified. Maybe you have a logo here, or maybe you’ve got an actor or some kind of interesting framing in your video and you want the text right justified. This is a great way to spice up your type and I’m going to show you how to do it now.
Go under Composition and New Composition, or hit Command End. It’s going to bring up the same settings that you did last time. I’m going to call this Side Type [inaudible 00:10:23]. Hit OK. Once again, we have an empty timeline. Make sure you click on your type tool and let’s go ahead and let’s type rampant real quick. Scale it up just a little bit. That’s pretty good.
I’m going to highlight rampant and duplicate it, turn the bottom layer off, and change this to design. Turn both layers on, highlight design, and Shift and the down arrow key, and reposition [inaudible 00:10:49]. Type. There, that’s pretty cool. I’m all right with that. I’m going to highlight both by hitting Command A and Shift, and moving over using the right arrow key. Move it over to where I want it to be, move it up and down. There, that’s pretty good. That’s fine right there.
Our layout is fine. Our last position is fine. What do we do next? We animate. Highlight both layers by hitting Command A, go to one second on the timeline, and hit P. If both layers are highlighted and you click the stopwatch, it’ll create a keyframe on both layers so we’re good. That’s our final resting point.
Move back to the first frame. You can hit home or you can click and drag it. Since both are currently highlighted, I’m just going to hit Shift and the left arrow key, and move this to about here. That’s where I’m going to have the animation start. Of course, if I hit space bar, boom, there it hits that brick wall that I loathe.
Go ahead and click and drag the final keyframes. Right click the keyframe assistance. Use the Ease In. Nice and smooth. Now I want to stagger these animations [00:12:00] because if I didn’t, I could have made this on one type layer. I didn’t need to do it separately unless I wanted to separate it, so you could do that one of two ways.
You can actually grab the text and move it down with the physical layer down. I put it around the 12 frame mark, so it comes in about half way through and that’s great. If that bothers you that you’ve got the layer not starting at zero, it’s fine. Just it back to where it was and then click and drag both keyframes, and then just move them like so. Boom. Our animation is done. What’s next? We matte it.
First, we do Layer, New, Solid. Again, I’m using solids and I’m using Luma. I’m going to keep mine white. If you’re using Alpha, it doesn’t matter what color you’re using. Go ahead and click OK. Now the white solids are both, both layers I want to pull it down between design and rampant because I’m working on the matte for rampant.
The first thing we do is go ahead and readjust the position of the solid because we don’t want to take the whole screen, because it will show everything. Let’s just hold down Shift and put it right to the left of design. You can actually use your arrow keys to reposition it. That’s pretty good. Now we’ll turn on the track matte for rampant. Go to Track Matte right here, pull it to Luma Matte, and now you can see rampant.
Let’s roll it back. Boom. There you go. Now rampant is matted, design is not. What do we do? Let’s go ahead and duplicate our layer, just our matte. Hit the Command D, pull it up above design and turn track matte from None on design to Luma Matte. Very cool. Very simple.
Moving onto my favorite Split Type effect, this is the one where the text comes out from the center. It’s all jumbled and then, boom, reveals your type. [00:14:00] Super simple to do just like last time. Let’s go ahead and go Composition and New Composition, or Command End. Same settings as last time. I’m going to call this Horizontal Split. There we go.
First thing we need to do is put our type in, so I’m going to go ahead and type rampant, like that. Scale it up a little bit. That’s pretty good. Hit duplicate, turn off the bottom layer, and switch it to design like so. Turn on both layers and move design over, so it’s not on top of rampant. There you go.
Now I’m going to highlight both layers and Shift, and use the arrow keys to position this to where I want it to be. I want design to be over just a little bit. There we go. That’s cool. That would be our final resting position. Once again, we go to one second because that’s where I want our animation to end. Hit Command A and hit P to reveal the positional information. Go ahead and click on the stopwatch to create two keyframes. Then go back to the first. Then we just end it. Just have a little bit of fun.
I’ll pull design way over here and I’m going to pull rampant way over here like so. Really exaggerated in [inaudible 00:15:27] like this. Chow, like that. Same exact technique as last time. Of course, there is that dreaded brick wall of a keyframe, linear keyframe because I hate them.
Go down to Keyframe Assistant and Easy Ease In. Cool. Now comes time for the matting, so go to Layer, New, Solid. Hit OK. Pull this above rampant and beneath design because this is going to be the matte the rampant.
Now the cool thing about the mattes is if you make a mistake or you put [00:16:00] it in the wrong place, you can always reposition the mattes. Let’s say someone rings the doorbell and you’ve got to sign for a package, you get a phone call or whatever and you forget what you were doing, it’s all right. You can always reposition the mattes.
Right now, the matte is covering the entire screen. We don’t want that. What we want to do is hit P and we want to pull it over just to show rampant like so. Then go ahead and highlight rampant, put a track matte, switch it to Luma. Now rampant is only showing in the white just like before. Cool. Let’s do the same for design.
Let’s go ahead and highlight our matte, duplicate it, put it above design, and this time we want it to be in the other direction. Let’s turn it on here, drag it to be just over design. Great. Now switch the Luma matte from None to Luma on the design layer and pull back the timeline. There you go.
You can always readjust. If you don’t like where that matte line is, just pull it over just a little bit. You can make it as wide or as narrow as you want. There you go. That’s how you do Split Type in After Effects. Super simple. Great way to spice up your type. Now let’s head on over to Premier and I’ll show you how it’s done there.
Jumping into Adobe Premier, first things first, I have to say that it’s a lot easier to do this effect in After Effects. After Effects is an animation tool. I’m not saying you can’t do this in premier, but what I’m trying to say is that unless you just don’t want to leave premier, you don’t want to use After Effects, or you just don’t feel like leaving your editor, I think it’s a lot easier. There’s a few more steps involved in Premier to make this work, but we’ll just do this anyway to show you how you can accomplish this in Adobe Premier.
First things first is you need a title. Go under File, [00:18:00] New, Title. That’s Command T. It’s going to ask you some parameters. It’s 1920 by 1080, 23976, that’s great. Hit OK and then you’re going to get this box here. Go ahead and click on the type tool right here. Click anywhere on the screen and hit the text. I do not like this font, so I am going to change it.
[inaudible 00:18:27], bold, there we go. Let’s go ahead and scale this by holding down Shift and dragging out. Reposition this. That’s pretty good. What you’ve now created is a title, so I’m going to close this box real quick and it’s created this title in your project window.
Now go ahead and duplicate that under Edit, Duplicate, and now you’ve got two, one that says rampant, one that says rampant. Duplicate, click on your duplicate and then just change type. Change that to design and I’ll pull this over just a little bit. There we go.
I’ve got two title cards, one that says rampant and one that says design. Let’s drag this into our timeline. The great thing about these title cards is you can make them as long or as short as you want just by dragging them out and then put design underneath it, drag it out. Just like you saw in After Effects, they’re on the same line basically, so I’m going to click on one.
Under Effects Controls, under Motion, twirl that down, you can reposition it right here. That’s pretty good. I’m reasonably happy with that. That’s pretty cool, so now we have our type. You know what? I actually want to reposition this just a little bit. Pull rampant up just a skosh and then go back to design, [inaudible 00:19:53]. There we go. It makes me a little happier.
We’ve got our layout here. The next step is to animate just like we did before, [00:20:00] so we just happen to be in a random location in this timeline. I’m at 5618. I want it to go one second up, so I’ll just go to 5718. There’s a million ways you can do that. Right there. I’m going to zoom in just a little bit. Again, this is our final resting point for our animation.
The first thing we want to do is highlight each layer. Go to Effects Controls and click on Reposition to create a positional keyframe. Go ahead and do that to the layer beneath it, position, so now you’ve got two keyframes.
Go back to the beginning which is one second away and we just do what we did in After Effects. Highlight our layer and we’ll put rampant where design was. Then click beneath it to go to the other layer and put design where rampant was like so. Once again, if we roll through this timeline, like that.
Again, you’ve got those crazy linear keyframes where you can actually ease the keyframes in Premier too. Just click on the final keyframe, right-click, Temperal Interpolation, and do Ease In. It’ll be the same for rampant. Let’s go ahead and zoom in like so. Click on the last keyframe, right-click, Temperal Interpolation, Ease In. See, nice and smooth. The animation is done.
The next thing you need to do is a matte. However, here’s where things get different. You cannot matte type. Premier does not see this as a layer, a video layer, or anything other than a title. It handles titles differently. If you were to matte this, it would not work. What you have to do is you have to nest these.
First things first, you’re going to go ahead and click on this layer, right-click on it and hit nest. Let’s just call it something, so we don’t start looking at sequence five, sequence six, whatever. Change it to rampant [00:22:00] and highlight the bottom layer, right-click, and hit nest under design.
Now if you ever need to go back in, all nesting is doing is putting a timeline inside a timeline. It’s just like pre comping in After Effects. You can double-click on the layer and you can get back to it. If you needed to change your animation, you want to change your font, whatever, you can do that. It’s real simple, but you have to nest this in order for Premier to see this is a layer that you can matte. That’s just how it works. It’s just one extra step.
How do we create a solid in Premier? Just go under File, New, Color Matte. Again, it’s going to ask you for the frame size and speed. I’m going to pull white because I like to do Luma and just call it whatever color matte. That’s fine. It’s going to generate it right here in your project window, so go ahead and put this on the timeline.
Now we’re going to have to go ahead and move some of these layers up, so we have room to play. The first thing we’re going to do is rampant, so let’s go ahead and put the matte right above rampant. Of course, it’s covering it just like it always did in After Effects, so highlight your color matte. Go under your effects controls, twirl down motion, and we just reposition it to taste. You want it to be just outside of rampant like that, covering up rampant.
In order to do a matte in Premier, you need a track matte key, so go under Effects, Video Effects, Key, Track Matte Key. You want to go ahead and drag that onto your type. It’s going to come up here in the effects controls and it’s going to ask you a few questions. First of all, where is your matte? It says none. You want to change that to video layer five which is where our matte sits. Then do you want a matte Alpha or Luma? I’m going to do Luma. If I roll it back, there you go. Rampant is done. [00:24:00]
Then what do we do next for design? Same technique. Go ahead and you can either go to your project window and drag the color matte back in or you could have just duplicated this one and pulled it down. Highlight this matte, go under effects controls, twirl down motion, and go ahead and cover just design like so. Now that’s covered.
Again, go back to effects or you can copy from the previous layer. Go ahead and drag track matte key onto design. It’s going to ask you for some information in the effects controls. Track Matte Key, it says none. You want to make sure that is video layer three. That’s where our matte is right here, so none, video layer three and [inaudible 00:24:44]. If I roll it back, there you go.
Of course, you want to make sure you leave some room for whatever is going to go beneath these titles. If you have just some video, just throw it over video. If you want to get funky and you want to put some cool design in the background behind it, you can do that as well. You can animate that background in and out.
Super simple to do Split Type in Premier, so that’s about it. That’s how you Split Text in Adobe After Effects and Adobe Premier. I hope you found this helpful. If you have any comments or questions, please leave them in the comments below. Also hit us up if you have a question that you want featured here on Ask Rampant.
Make sure to sign-up for our weekly newsletter. It’s chalked full of cool tutorials not just by me. We’ve got Kes. We’ve got Final Cut Stef @FinalCutStef. We’ve got the world famous Kevin P McAuliffe. We’ve got all kinds of great free tutorials.
We offer free effects every week through 4K Free. You can get hundreds of free effects if you’re interested and we also have amazing deals for editors and motion graphics, and visual effects artists. You’ll find the link to our newsletter in the description of this video. Until next time, I’m Sean Mullen from Rampant Design. Thanks for watching.
[/toggle]
