Use Glitch and Distortion Effects to Stylize Your Edit in Adobe Premiere Pro
Rampant Design CEO and Lead Creative Sean Mullen Shows Us How to Use Distortion Effects to Add Dynamic Effects to Your Edit in Adobe Premiere Pro.
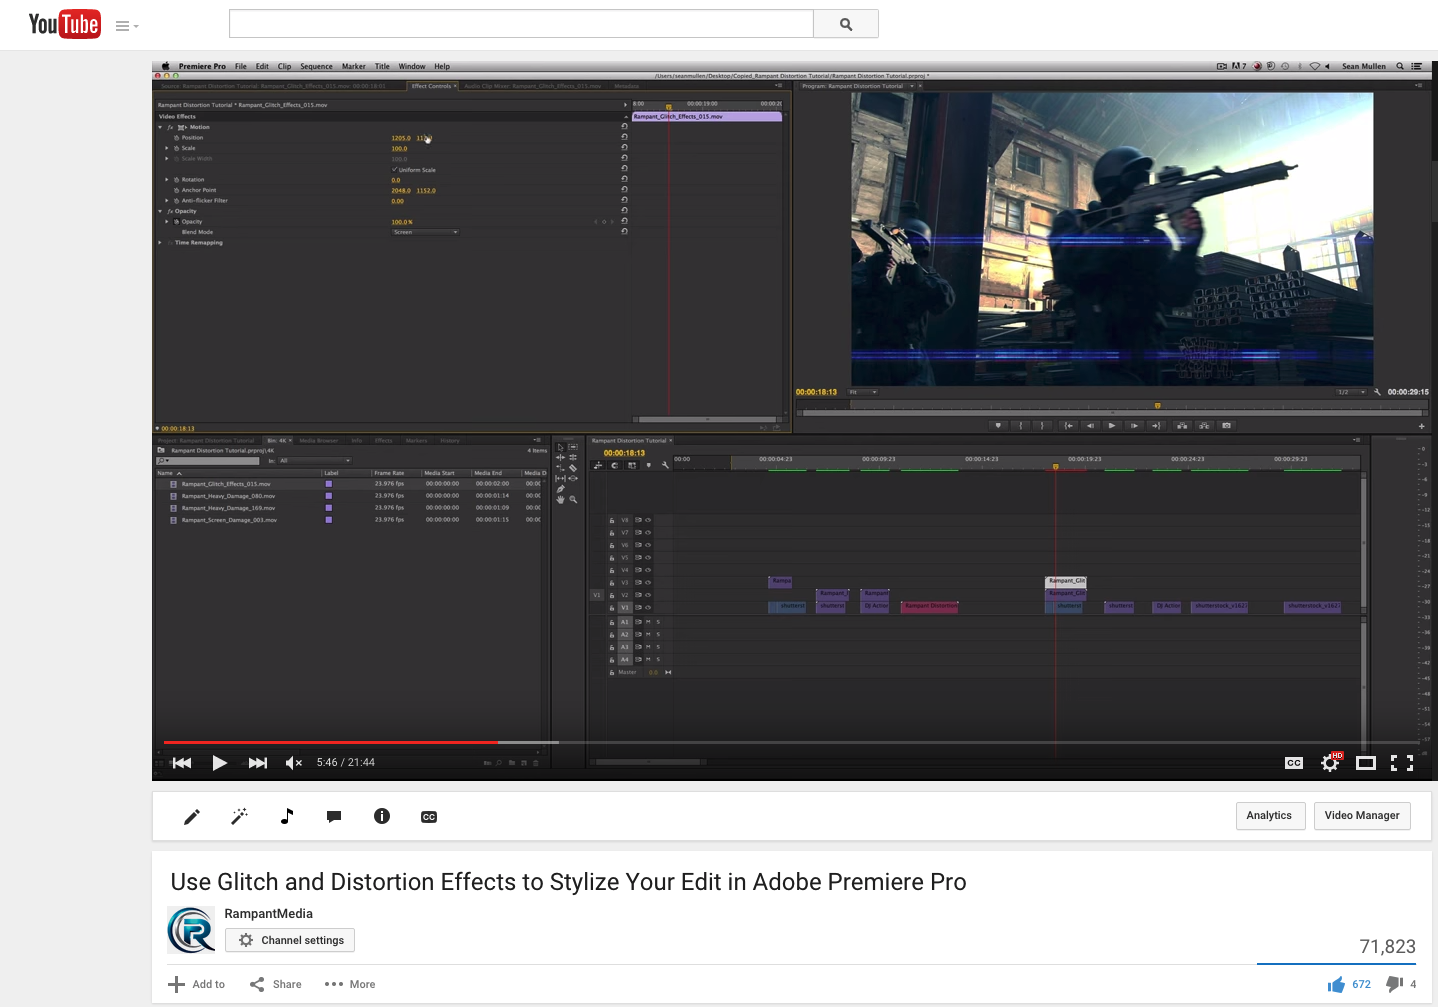
Use Glitch and Distortion Effects to Stylize Your Edit in Adobe Premiere Pro from Rampant Design Tools on Vimeo.
Sign Up for Our Newsletter and Grab Your Free 4K Effects Today:
[toggle title=”Video Transcription”]Use Glitch and Distortion Effects to Stylize Your Edit in Adobe Premiere Pro Video Transcription
All you have to do is:
Hey, hey everybody. I’m Sean Mullen from rampantdesigntools.com. Today, I’m going to show you how to stylize your video in Adobe Premiere Pro using glitch and distortion elements from our new library, the distortion toolkit. Don’t freak out or anything. Scroll down to the bottom of this video, click that link, and we’re giving away a handful of free, that’s right free, 4K distortion and glitch affects. That way, you can follow along with us in the tutorial and you can see firsthand how powerful these elements really are.
You might be asking, “Okay. What are we talking about? What’s this distortion toolkit?” If you haven’t heard about it, let’s jump on over to distortiontoolkit.com. That’s distortiontoolkit.com. It will take you right here on the Rampant website. This is our new library. It’s over 2,500 glitch and distortion effects. It’s available in 2K, 4K, or 5K. It comes as a download or on a USB 3 hard drive. If you get the hard drive version, it comes with alpha channels.
If you go to the site, you can check out the promo video. It’s pretty cool. You can read up about it. The best thing about this page right here is, if you scroll down, always look for this image on our website. Every single product has a test drive button. You click that test drive button on every product page and you’ll have dozens of free effects that you can use. We’re always giving away the 4K stuff. We’re not giving away the small 2K stuff. We’re giving you the heavy-hitting stuff.
If you scroll down a little further, you’ll see the distortion toolkit preview sheet. This will actually give you a preview of every single clip in the library. Like I said, it’s over 2,500. This is not a volume. This is an actual toolkit. It’s massive. We have everything from 8 bit effects, distortion elements, glitch elements, streams, analog stuff like old VHS hits and snow. You name it, we’ve got it. [Interesting 00:01:43] screen effects. You slap the effect on it and it looks like you’re looking right at a computer screen or a television screen. This library is insane.
All right. Enough of my jibber-jabber. Let’s move on to Adobe Premiere. We’re in Adobe Premiere Pro now. This is my editor of choice. You do not [00:02:00] need Adobe Premier Pro to use our content. Everything that Rampant makes is QuickTime-based. It will work in After Effects, Avid, Media 100, Final Cut, Motion, Shake, Nuke. As long as you can bring in a QuickTime movie, you can use our stuff. If you’re not sure, go ahead and grab any of our free clips that are on the website. Just look for that icon that I showed you earlier and bring in the clips into your timeline and see if they can work or not. If they don’t work, send us an email. We’ll figure it out or we’ll work around. Otherwise, it should work for you.
That being said, Adobe Premiere Pro is my editor of choice. This is what I cut everything in. I love it. I know Final Cut’s [dev 00:02:34] is working on a tutorial right now for the distortion toolkit in Final Cut. Look out for that as well. If we’re not doing tutorials in your software, let us know and we will find someone to do do a tutorial for you. We’re in Adobe Premiere and we’re about to rock the 4K distortion. Let me just show you real quick what we’re going to do here. We got this cool SWAT shot, with a little bit of distortion [hits 00:02:55]. We got this music video, with some effects. It’s got a DJ club scene thing going on. We’ve got another SWAT shot.
The cool thing about this last shot here is, as you see these other shots, right here you’ve got our cool overlays. They’re definitely damaging the video, but they’re not affecting the video. Here, however, in this fourth clip, check it out. This is really cool. You can actually see how our element is displacing the image, based on the luminance value. Very cool. I’m going to show you how to do that. All right. First things first, let’s go over this. This first shot here, the SWAT shot. Here is the raw version of that. It’s got a little bit of a speed ramp to 100%. Kind of cool. Your director’s like, “You know it just needs a little something, something.”
No problem. What I’m going to do is I’m going to pull up glitch effects 15. That looks great, yeah. Drag it over my timeline, right over the clip that I want to have the distortion effect on, and drop it. Now you see. It’s like, “Well wait a second.” If you’ve never used our content before, you might be like, “Well hey, what’s wrong? Is it broken? [00:04:00] Did I do something wrong?” No, nothing’s wrong. Nothing’s broken. We just need to be able to blend this into the shot below. What we’ll do is we’ll double click on the glitch effect. Go to effect controls, twirl down opacity. Right here, where it says blend mode, change that from normal to screen. Boom, you’re done. Roll it back. Hit play. Now you’ve got a really cool effect. Now when it comes to these distortion effects, there’s over 2,500.
The beauty of these things is that you can stack them and you can make your own. You can literally turn 2,500 into 10,000. Check this out. Yeah, you know maybe this is kind of right. Maybe it’s not right. Maybe it’s not bright enough. Whatever the case may be, if your client’s being a little picky. It’s like, “Ah, that’s cool but maybe it’s not cool enough.” Okay, no problem. Here’s some solutions for that. For 1, this is a 4K file and a 1080p timeline. We have a lot of room to play. Let me show you. Scroll down your motion tab on your effect. Watch this. Now I can [reput 00:04:55] the shot because it’s so much bigger than a 1080p frame. Pretty awesome. That right there helps a lot.
I can also scale it down if I wanted to, if I wanted to make it smaller. I’m going to go ahead and also show you some other cool things you can do here. Right click on the clip and hit scale to frame size. That will automatically fit the 4K shot into your 1080p clip. That’s cool. Let’s try something else. I’m going to undo that and I’m going to click this image. I’m going to hit the option key and pull up. That’s going to duplicate. See how much brighter it is there. If brightness was an issue because this is blue and the scene is kind of blue, that right there solves your problem. You can also use color correction filter on it if you want, but that’s a very quick way of adjusting the brightness. Then you’re not making your client wait.
The great thing is double click on the top element now. Let’s move this around. Let’s actually reposition this a little bit. Maybe move it over so it’s not looking like a copy, maybe scale it down a little bit, and roll this back. Oh, now I’ve added more, but it’s still in the same effect style. Now I’ve taken this clip and I’ve made it my own. Essentially, if you’re doing a lot [00:06:00] of distortion effects, some of our clients work on reality shows that are heavily based in distortion effects, you can mix and match and essentially make your own presets by doing this particular technique. All right. Moving on. We’ve got this cool bass player. It’s the funky, out of focus effect that you see in most music videos. It needs something else.
Once again, we just really want to damage this up. Maybe the theme of this video is distortion. Let’s go ahead and click our damage effect and drop it on top. Again, you’re like, “Well what happened? Nothing happened.” You can double click. Go to effect controls, twirl down opacity, and change blend mode from normal to screen. Now what if you’re doing a lot of effects? Do you want to do that every time? Do you want to double click on the effect, go to effect controls, twirl down opacity, switch blend mode from normal to screen 20, 30 times? I’m guessing you don’t. I personally don’t want to do that. I’m going to go ahead and undo all that. I’m going to drag the clip here back over our clip, drag the effect over our clip like that.
I’m going to double click on our first effect that we used. Click on effects controls. Right here where it says opacity, highlight the opacity and hit copy. Right? Now go over to the new clip and hit paste. Now I’ve copied the blending mode from the first clip to the second clip. That’s also on my clipboard now so I can paste that, if I want to grab another shot over here just randomly and drop that over. I can just highlight it and hit paste. See? The blending mode’s already there for it. As long as you don’t copy or paste anything else while you’re doing that, you can keep that there. You can always go back to a previous clip, copy and paste, or go through the motion. Double click, go to effects controls, twirl down opacity, and change blend mode to screen.
You could also play with these other bundles. You’re going to get some other really cool effects. Like if you switched it to overlay, you’re going to get this really cool gradient. It’s always based on the imagery beneath it and what the actual luminance values are in each individual clip. Don’t be afraid to experiment. If you want a really hard-hitting 1, go to linear dodge, which is known as add. Again, be careful because if you’re working in broadcast, this right here might be clipping. Always make sure that you are [00:08:00] working within the color space that you’re supposed to. I’m going to use screen because it’s the most universal. It doesn’t mean it’s the best for every particular shot.
Definitely have fun with this stuff. Experiment. That’s the difference. That is, if you’re looking for [glitchy 00:08:14], it doesn’t get any [glitchier 00:08:16] than that. That’s pretty awesome. You can see the glitch can’t contain in the luminance value of the guys there. It’s pretty awesome. Have fun with it. Don’t limit yourself. Look how easy it is to change an effect, difference, screen? If you have a client sitting behind you, just by switching blending modes, you can give them a whole bunch of different options. I mean that is just really cool looking right there. That’s a little too glitchy for me, but it doesn’t mean it won’t be too glitchy for you. Okay.
Let’s go back to this bass player shot. That’s pretty cool. The other great thing about our effects is, when I shoot these effects and create these effects, I keep 3 things in mind. Speed is the number 1 important, creativity, and affordability. Speed being you literally just drag a clip onto your timeline, put it over your shot, and you switch the blending mode and you’re done. It doesn’t get any faster than that. Speed also applies to swapping something out. Let’s say I don’t like this clip. I like the idea of distortion, but it doesn’t match here. Let’s put this shot over here. We’ll just highlight your clip, hold down the option key, and drag the new effect over it and it replaces it.
Now I’ve just replaced it. I can keep doing that until my client or myself likes what we see, or me, myself, and I, whatever. It’s that simple. That’s what we mean by speed. Creativity? These are 4K elements in a 1080p timeline. Like I showed you, you can reposition the shots. Let’s go over here to a big 1. Yeah, there we go. Go to effects controls, twirl down motion. Creativity allows you to reposition the shots. It allows you to scale them down. You can also go into your favorite color corrector and change the color. These are not heavily compressed QuickTime movies. These are all in pro res, giving you plenty of latitude [00:10:00] to use color correction and to match your shots. That’s what we mean by creativity.
Of course affordability. We try to make these volumes affordable enough to where if your client or your customer can’t afford them or they can afford them but your PO can’t get done in time or whatever, you yourself, as the owner and operator or artist or editor, can purchase them yourself. We try to make these as cheap as possible so anyone can afford it. Then back to the distortion here. As you see, I mean you do this once, you do this a thousand times. This is really simple to add distortion effects to your timeline. The last effect that I promised is what if you want the distortion to actually displace the video? When we say distortion, there are 2 types of effects that you’re seeing with your eye.
You’re seeing the overlay effect, which is this stuff right here, the color imagery that represents the distortion and the damage. Then you see displacement, which is seen right here, where you see the actual video being torn and displaced and moved. What if you want to do both of those things? That’s easy to do. If you have Adobe Premiere Pro CC or CC 2014, you have the power of After Effects behind you. Now don’t get scared. Some people hate After Effects. Some people don’t want to use it for whatever reason. You don’t have to know anything about After Effects in order to make this awesome effect. I’m going to show you why. The first thing you do is, I’ll start over here.
Let’s grab this screen damage effect, which is 1 of my favorite clips from the library. I’m going to grab it and drag it over my clip here with the SWAT team. Of course there’s no blend mode so we’ll highlight that and hit paste. Now we’re blending. All right? Like you said, “I want this to displace.” Not a problem. Let’s take the cursor and drag over both clips. Then right click to replace with After Effects composition. All right. What that’s going to do is open up After Effects. Right? I want to show you this. I’m working with 4K elements and I’m working on an ancient iMac. This thing is like 6 years old. 4K is not that scary. It’s not going [00:12:00] to weigh you down. Check this out. If you’ve never used After Effects before, if you have bear with me just 1 second.
All this is right here is what’s called an After Effects composition. What this is, is this is representing what we just had there in the timeline. This is just your video here on layer 1. This is the SWAT team right here. This is our effect here right above it. If I hit play, if I hit preview right here, see it’s the same thing that you saw in Premiere. No big deal. Now 1 cool thing I want to show you is this is a 1080p frame. This is a 4K frame. That is what I’m talking about. That’s how much latitude you have by using our 4K elements in a 1080p timeline. I highly recommend that if you’re going to work in 1080p to use 4K elements if you want extra creativity, extra latitude, extra room, extra play room. All right. This is super simple.
For those of you who use After Effects, you’ll follow with this real quick. For those of you who haven’t, I promise you this is going to be simple. All right. What we’re going to do is we’re going to scroll through the timeline until we see some full-frame damage right there. Okay. We’ll call that our very first frame. We’re going to highlight our video layer. I’m going to go up to effect. I’m going to go down to stylize. I’m going to do motion tile. I’m only going to add 1 more effect here. Effect, distort, displacement [map 00:13:16]. Okay, that’s it. That’s all the effects we’re going to use. All right. I’m going to explain what everything does here real quick. Let me turn off the effect here. Let me turn off the damage effect here real quick. All right.
Motion tile. Why do we use that? We’re going to actually physically move the … We’re going to physically move the frame here. If I just switch this over here and I show you, I don’t want to see this. While we’re displacing, this is not what I want to see. I don’t want to see blank. I don’t want to see the frame line. That’s no bueno. Now if that’s what you’re looking for, cool. You don’t need motion tile. However, motion tile is going to allow you, if you change the output width to 200 and the output height to 200, now check it out. You’re now pulling the imagery and it’s taking what was here and [00:14:00] putting here. That’s good, but I want it to be slightly better. It’s better than having no frame there and just being empty.
What I really want to do is make it look like this part of the shot continues. What we’ll do is we’ll hit mirror edges. Boom. Now, while we’re displacing, there’s always imagery there. When you put the content back over it, when you put a Rampant effect back over it, it’s going to look like, “Oh hey, all I’m doing is just displacing the image here. I’m not altering the video.” Okay. We’re done with motion tile. Again, just switch your output width to 200, your output height to 200, and mirror edges. All right. Now onto displacement map. When you first get displacement map turned on, it’s actually setting the displacement to your video layer. This is the effect you’ll get if you alter the imagery.
This is an effect known as data moshing. This is not what we’re doing in this particular tutorial but, if you’re looking to do a data mosh effect, all you’re doing is displacing the video with itself, as you see here. The displacement map layer is our video layer. That’s a cool effect, but that’s not what we’re doing. The first thing you want to do is switch your displacement map layer from 2 to 1 here, where it says Rampant screen damage. Now you can see, “Oh okay, that looks more like what the Rampant damage was doing.” All right. Let’s turn our Rampant effect back on, so we have a frame of reference. Now check it out. This is what I love about this effect. Where the Rampant effect is, it’s completely distorted. Where the Rampant effect is not, it’s just imagery pulled over. This is all based on channels.
The first thing I’m going to do here is change our channel effects. I personally like using luminance. You can experiment. This is where you have fun. You have all these options right here. I personally love using luminance. I’m going to set horizontal and vertical displacement to luminance. Yeah. Okay. Now remember how we said we were going to look for our first frame of real distortion? I’m going to call that, this is our first major frame of distortion. I’m going to click a stopwatch right here. I’m going to twirl down the effects in layer 2 here. All this is doing is [00:16:00] this is showing the same thing, information up here. I also have my timeline. I can actually move key frames around and whatnot. By clicking the stop watch, I’ve put it down in key frame. Real simple.
Now let’s scroll through the timeline until we see that the damage is done. Let’s call this the last frame of the real crazy damage. Now I’m going to click right here, which will create another key frame. I could have also highlighted that key frame and hit copy and hit paste, same thing. Now we have 2 damaged key frames. Now let’s go down a few frames here. Let’s call that our last frame. I’m going to turn that damage to 0. Awesome. Let’s go back to our first key frame and go a few frames forward. Cool. Put that 1 at 0. I could also copy and paste. Very simply, we’ve got our 0 key frame here, so there’s no damage going on here. Then a few frames later, a crazy amount of damage. Damage, damage, damage, damage, damage. This is our last full frame of damage.
Then a few frames later, no damage. It’s 0, full, continue to full, and 0. Right now I’ve got this set to a crazy amount of 508. Let’s, I don’t know, call that 279. Then over here, let’s call this a little bit less. Let’s, I can double click on it and add the value here. I’m going to say, let’s call it 99. All right? Let’s roll it back. I’ll hit space bar and you’ll see very quickly. How cool is that? You actually see the video being displaced by the luminance values of our effect. You’re getting the power of the visual distortion, along with the actual displacement. If I go frame-by-frame, you can actually see it. Check that out. See? Everything is being distorted based on the luminance. If I go 1 frame forward, here’s your half and half shot that we saw.
This is all being distorted and this is not. Now that’s, I’m happy with that. If you want to do more than horizontal for this shot, I wanted to do a horizontal. That’s real simple. Just click the key frame for max vertical displacement and do the same thing [00:18:00]. Put your 0 key frame here, come up with something here. Let’s do, I don’t know, yeah there we go. Let’s do something crazy, 147. Click the key frame there and go back here and turn this off, back to 0. Let’s go back to this last distortion key frame. Let’s do something like 45. There we go. All right. Cool. If we roll that back, now you’re getting this down and to the right effect, which is, if that’s what you want, it’s really cool. Add a little sound effect and you’re good to go. It’s that simple.
Just play with the horizontal displacement. Play with the vertical displacement. Then play with how you’re displacing, meaning do you want to displace based on luminance? Do you want displacement based on specific colors? Do you have an alpha channel? Displace it on that. Displace it on a hue. You can have a lot of fun. All right. For my shot, like I said before, I don’t want the max vertical displacement. I’m going to erase all that. I’m going to turn that to 0. Okay. If you’ve never used After Effects before, you’re probably like, “Well now how do I render this and put it back in my timeline?” The answer is you don’t. Just make sure you hit save. Go back to Premiere and it’s there for you. How amazing is that?
I love Dynamic Link. I use it all the time. It’s right there in your timeline. This alleviates having final 001, final 002, final 003. I mean I can’t tell you how many times I’ve been in a session where the client’s like, “Yeah that’s great.” They go to the bathroom, pop a pill or come back the next day and they’re like, “Oh no, I don’t remember … I didn’t approve this.” Okay, sure. It’s no big deal. That’s the great thing about the Dynamic Link is you’re not rendering. You’re not taking up valuable hard drive space and every time you make a change, it shows up in your timeline. Check this out. See how that’s nice and torn? Let’s go back to After Effects and I’ll show you.
I’m going to go ahead and just make a quick change. Let’s put that to crazy town setting. There you go. Go back to Adobe Premiere. See? Did you see it jump? [00:20:00] That is crazy. I mean it really is dynamic. Whether you’re working in pairs or you’re doing this all on your own, every time you make a change to that file, it’s going to show up as changed in your timeline. That is awesome. It doesn’t get any easier than that. Like I said, it’s super simple. Just like everything else we make, it’s ridiculously easy to stylize your timeline. Use those free 4K elements. Have some fun. We’ve got distortion in there. We’ve got glitch in there. We’ve got analog snow in there. We’ve got all kinds of streams in there. There’s all kinds of free stuff in there.
It’s all 4K so you’ll be able to play around and really experiment. That’s about it. It’s just super easy to use this stuff. If you’ve done it once, you can do it a thousand times. If you’re looking to add distortion effects to your motionographics work or to your video work, it could not get any easier than this. Like I said before, if you want to add some distortion and displacement combination, it’s very simple using Adobe Dynamic Link with After Effects. Even if you don’t know a thing about After Effects, you’re good to go. That’s about it. Thanks for your time. I always appreciate your comments. Please follow us on YouTube. Go to YouTube.com/RampantMedia and click that subscribe button.
We’re always creating new tutorials. I know I’m doing tutorials all the time; Final Cut stuff, NLE Ninja 00:21:10. We’ve got a bunch of other people jumping on right now to do tutorials as well. We’ve got new content every week. Of course that also means free products and free presets and whatnot every week. Also, follow us on, if you’re a Twitter user, follow us on Twitter at Twitter.com/RampantDesign. Check us out there or if you use Facebook, go ahead and hit us up on Facebook.com/RampantMedia. Until next time, I’m Sean Mullen for Rampant Design. Thanks for watching.
[/toggle]

This is incredible! Keep up the good work Sean thank you so much.
Nat
Thanks for the kind words Nat!
It never fails to inspire me. Hope to learn them all….
[…] Aug 11 […]